Ever since our trip to Italy this past summer, we have been wanting the
pasta attachment for our KitchenAid Mixer. We knew within days of arriving in Italy that we wanted to be able to make fresh pasta at home. We even purchased a ravioli press in the medieval city of Sienna in anticipation of making our own homemade ravioli once we returned home.
Once you've had fresh pasta, I promise you will be ruined for dried pasta! It just doesn't even compare. For Christmas, we decided that we would get the pasta attachment as a joint gift to each other. We tried it out for the first time a few weeks ago and the flavors took us back to warm summer nights dining al fresco in Italy. This dish will definitely be a new regular in our dinner rotation!
There are several parts to this recipe: the dough, the filling, and the sauce. The first step is to make the dough so it can rest while you prepare the filling. But before you start the dough, you will want to bake the butternut squash so it is ready when it is time to make the ravioli filling.
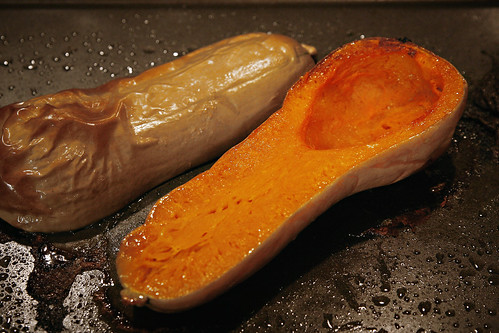
Preheat the oven to 400 degrees. Slice the squash lengthwise and remove the seeds. (I used a melon baller to scoop out the seeds.) Spray a rimmed baking sheet with olive oil or cooking spray. Put the cut side down on the greased baking sheet. Roast the squash in the oven until the flesh is tender when pierced with a fork. For a smaller squash it could take 30-40 minutes. For a larger squash it could take up to an hour.
While the squash is baking, prepare the pasta dough. We used the Kitchenaid Basic Egg Pasta recipe.
Ingredients for the Pasta:
4 large eggs
1 tablespoon water
3 1/2 cups sifted unbleached all-purpose flour
1/2 teaspoon salt
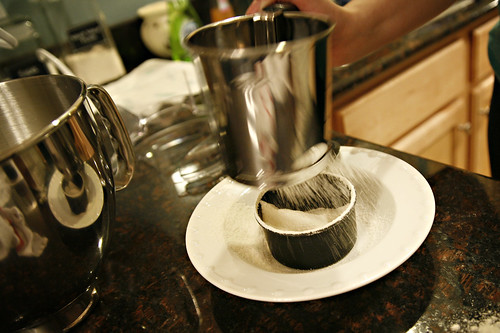
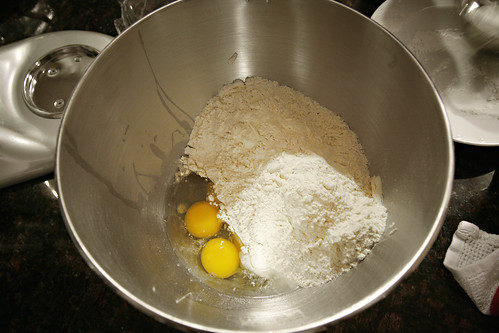
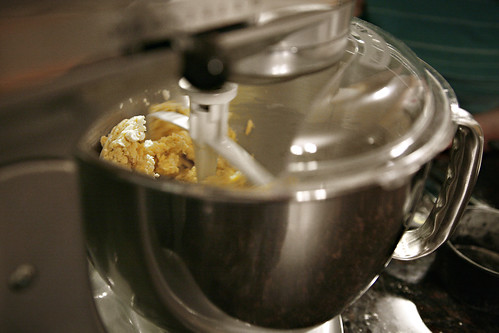
Sift the flour. I like to place my measuring cup over a shallow bowl and sift right into it. Place your measured, sifted flour into the bowl of your KitchenAid. Add the eggs, water, and salt into the mixer bowl.
Attach the bowl and the flat beater. Mix at speed 2 for 30 seconds.
Exchange the flat beater for the dough hook. Turn to speed 2 and knead for 2 minutes. Turn off the mixer and remove the dough from the bowl. Place the dough on the counter and knead it by hand for 1-2 minutes. Let it rest for 20 minutes.
*Note: The consistency of the pasta dough is important to successful pasta. Good dough is firm and leathery, but also pliable. It should not stick to your fingers or crumble & fall apart. If your dough feels too dry at this point, you can pat some water onto it and knead it in. You can also knead in a dusting of flour if it is too sticky. To test the consistency, before you rest the dough, pinch a small amount of dough together after you put it on the counter. If the dough stays together without sticking to your fingers, it should work well.
While the dough is resting, it is time to prepare the butternut squash ravioli filling. I used a recipe from the blog
100 Days of Real Food. You can find it
here.
Ingredients for Filling:
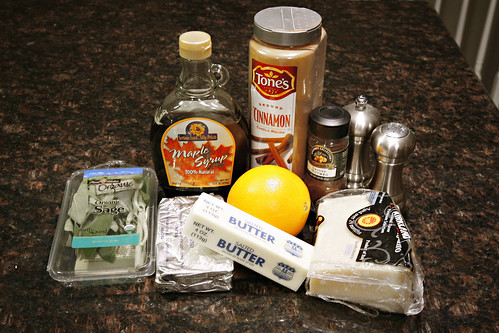
2 lbs butternut squash
1 tablespoon melted butter
1 tablespoon pure maple syrup
Zest of 1 large orange
½ cup mascarpone cheese (if you can’t find mascarpone use cream cheese as an alternative)
1/3 cup parmesan cheese
¼ teaspoon ground cinnamon
Pinch of nutmeg
Kosher salt and freshly found pepper, to taste
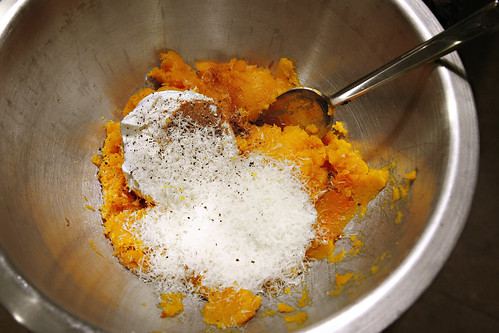
Scoop the pulp out of the baked butternut squash into a large mixing bowl and discard the skin. Add all of the other filling ingredients from the butter down to the salt and pepper and stir together thoroughly.
After the dough has rested for 20 minutes and the filling is prepared, return to your pasta dough.
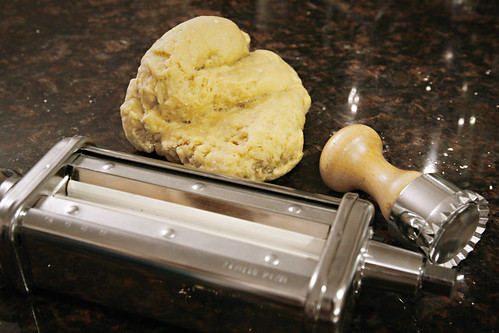
You will need a ravioli press and the Kitchenaid pasta sheet roller attachment (or another pasta roller.)
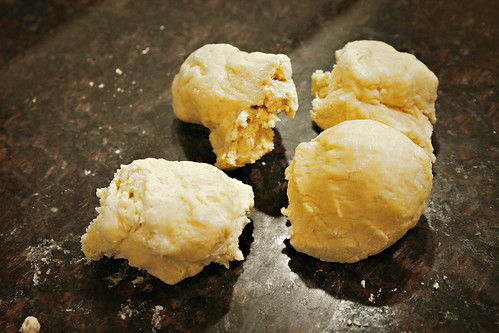
Divide the ball of dough into 4 pieces.
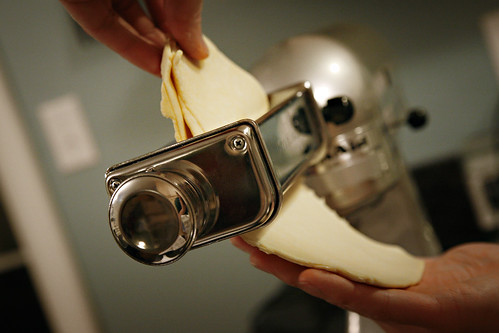
Flatten each piece with the heel of your hand before feeding it into the pasta roller. Attach the pasta roller to the mixer following the manufacturer's instructions. Set the adjustment knob on the end of the pasta sheet roller to 1 by pulling the knob out and turning it to setting 1, then release the knob. Turn the mixer speed to 2 or 4.
Feed one flattened piece of dough into the rollers.
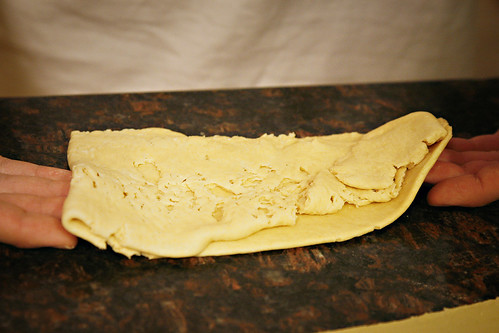
After it feeds through, fold the dough in half over on it itself, and feed it through the roller again. Repeat the folding and rolling process 2-3 times until the dough is smooth and pliable and covers the width of the roller.
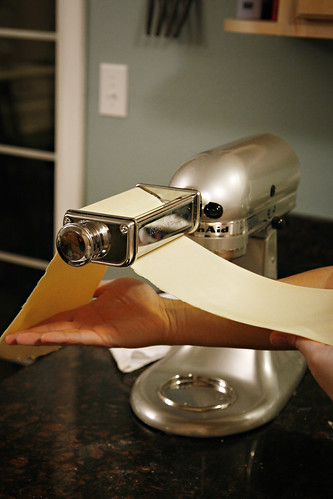
Move the adjustment knob to setting 2. Feed the dough through the rollers to further flatten it. After feeding it through the rollers on setting 2 a couple of times, increase the adjustment knob to setting 3. (Note, you only fold the dough on setting 1. Do not fold the dough on any of the higher settings. Just feed it through the rollers, then feed it through the rollers again.)
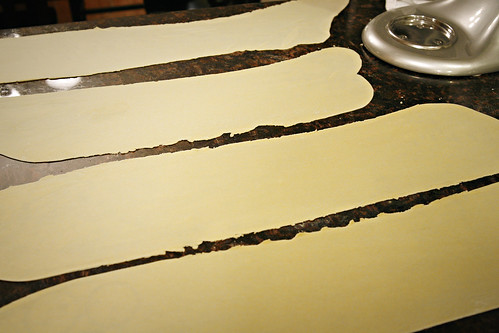
Continue to increase the roller adjustment setting, feeding the dough through, until you reach adjustment setting 5.
Dust the counter with flour and lay the thin sheets of pasta dough out on the counter. Repeat with the other 3 balls of dough until you have 4 thin sheets of pasta dough.
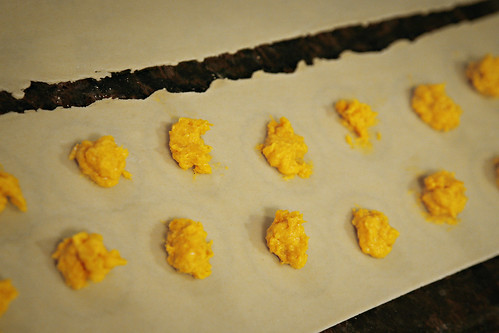
I used the ravioli press to gently make impressions on one sheet of dough to help me know where to place my dollops of filling. Be sure not to cut through the dough! You want to barely leave a mark visible to your eye.
Using a teaspoon, spoon dollops of filling into the center of each impression. You do not want to overfill the ravioli or the filling will squeeze out of the seal!
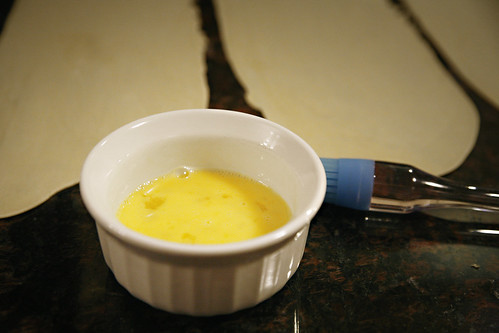
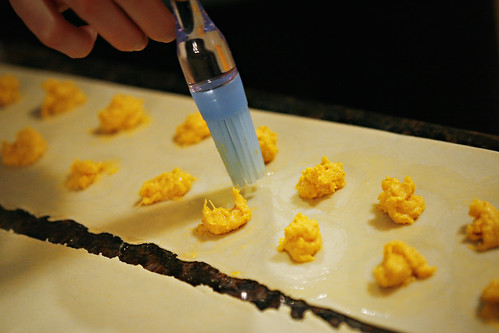
You will need an egg wash to seal the ravioli. Place one egg with a touch of water in a small bowl and whisk together.
Using a pastry brush, paint a small amount of egg wash around each dollop of filling to help the 2 sheets of pasta stick together when you seal the ravioli.
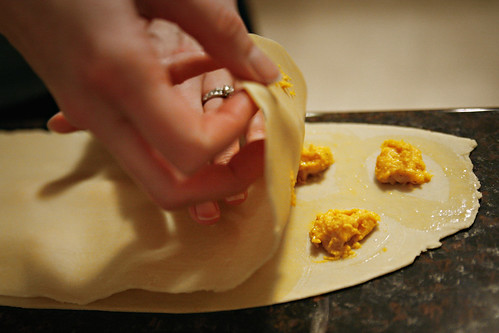
After you have applied the egg wash, lay a 2nd sheet of pasta on top of the sheet with the filling.
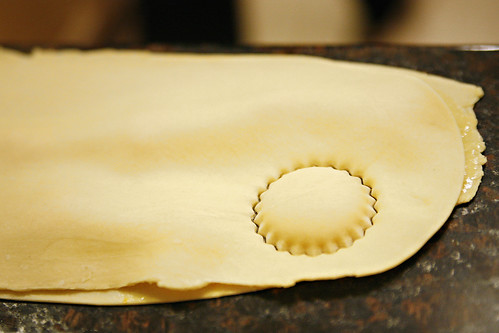
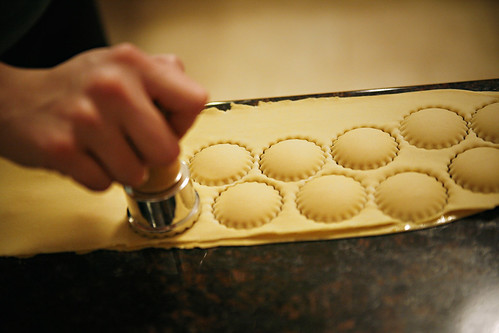
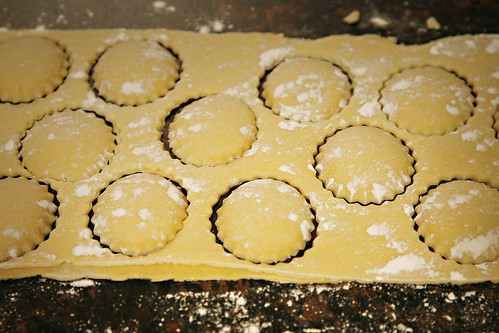
You will be able to make out the dollops of filling as bumps underneath the top sheet of pasta. Center the ravioli press around the filling and press down until you cut through both sheets of dough, sealing the ravioli.
Repeat for each ravioli on the sheet.
Using a thin spatula, slide the ravioli off the counter and place on a cookie sheet on a piece of parchment paper while you prepare the rest of the ravioli. Repeat the filling and ravioli cutting with the 3rd and 4th sheets of pasta. You can feed the leftover dough scraps back through the pasta sheet roller following the steps above to make additional sheets of pasta. (When we got near the end of the dough, we switched to the linguini cutter and cut some linguini with the last of the dough to store in the fridge for another night.) We had extra filling leftover, so I stuck it in the freezer to use in the future.
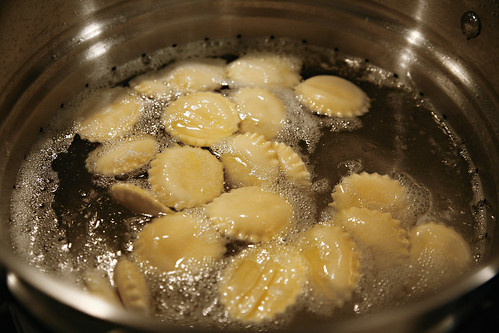
Put a large pot of water on to boil. Add about a teaspoon of Kosher salt into the water as it comes to a boil. Once it is boiling rapidly, add a couple quick pours (maybe 2 tsp) of olive oil into the water before adding the ravioli. This helps the fresh pasta to not stick together as it cooks. Add the ravioli to the water and boil it for about 5 minutes, or until your desired tenderness, stirring it periodically.
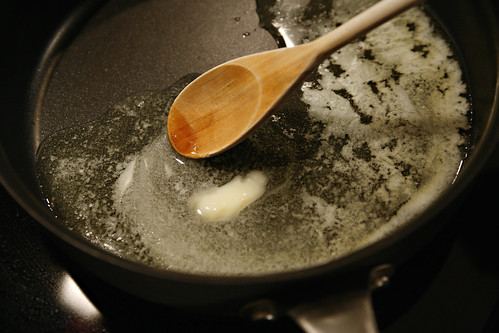
While the ravioli are boiling, you can begin melting the butter for the sauce.
Ingredients for the Sage Butter Sauce:
5 tablespoons butter
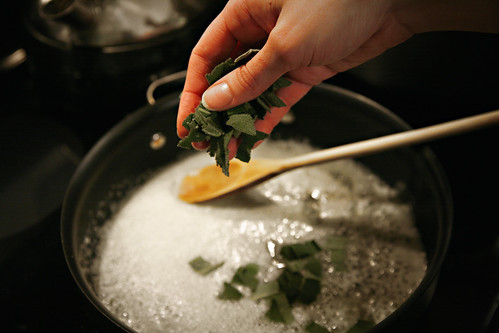
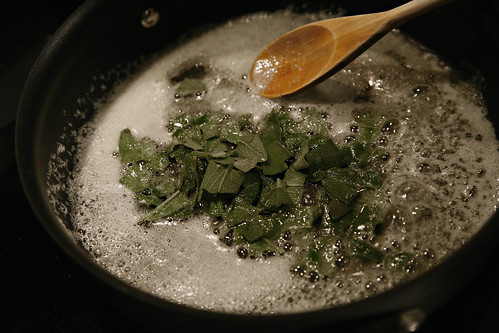
2 handfuls of fresh sage leaves, torn
White truffle oil (optional)
Add the butter to a sautee pan over medium heat and melt, stirring constantly.
Add in the ripped sage leaves. Stir into the melted butter and simmer until the butter just begins to turn brown and the sage leaves become crispy. Remove from the heat.
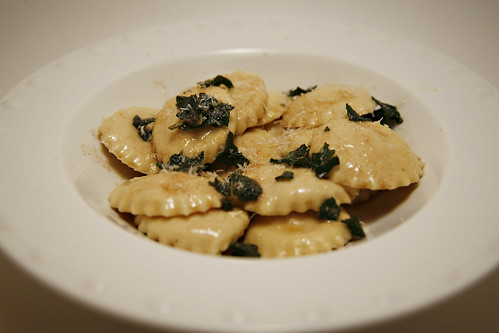
Drain the cooked ravioli in a colander. Spoon the ravioli into your serving dishes, then spoon some of the Sage Butter Sauce on top. Spritz with white truffle oil if desired, and top with a little bit of fresh grated parmesan cheese.
Florence is known for white truffles and white truffle oil, and they are plentiful in dishes. I absolutely fell in love with the flavor of white truffles! My best friend sent us some white truffle oil for Christmas and it was the perfect finish for our butternut squash ravioli. That flavor really transported me back to Italy!
This recipe made 60-70 ravioli! Since we were only cooking dinner for the two of us, I froze a whole bag of ravioli for later meals. I layered them between pieces of wax paper in a ziploc freezer bag. You can place the frozen ravioli into the boiling pot of water frozen, they will just need an additional few minutes of cooking if you are making them from frozen.
The many steps in this recipe truly makes it seem more complicated than it really is! It is honestly quite simple, and the taste makes the little bit of extra preparation time well worth it. This dish is just delicious!
We are looking forward to many more date nights of making pasta together and entertaining friends with some of our favorite fresh pasta dishes!